This functionality is for loan imports with preexisting balances in accounts such as outstanding interest, outstanding late fees, hold account (aka suspense/interest reserves), or an impound account.
You will also need to contact Bryt Support to have this Add Initial Balances ability (user privilege/claim) enabled on a user account.
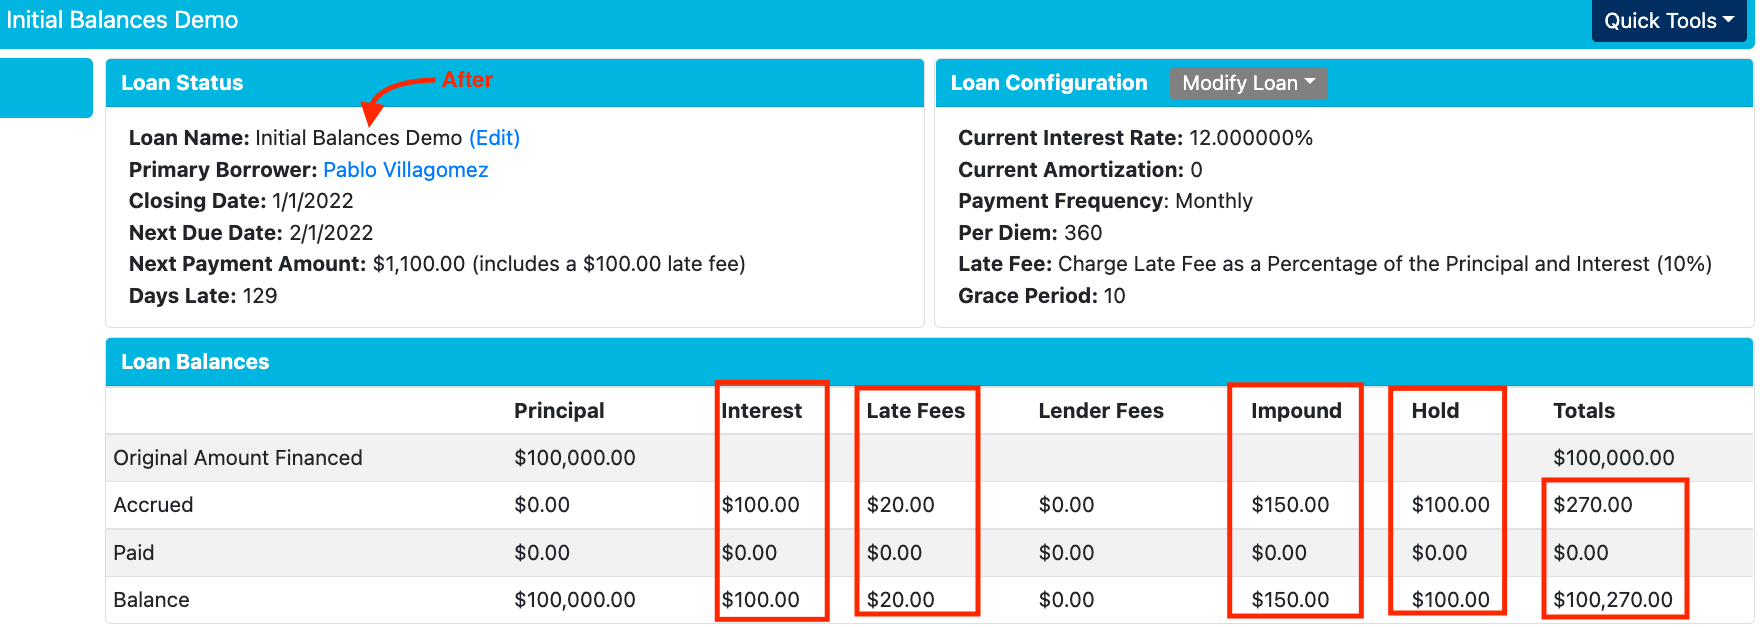
Added initial balances will reflect as original amounts on the loan's summary (shown in the image below).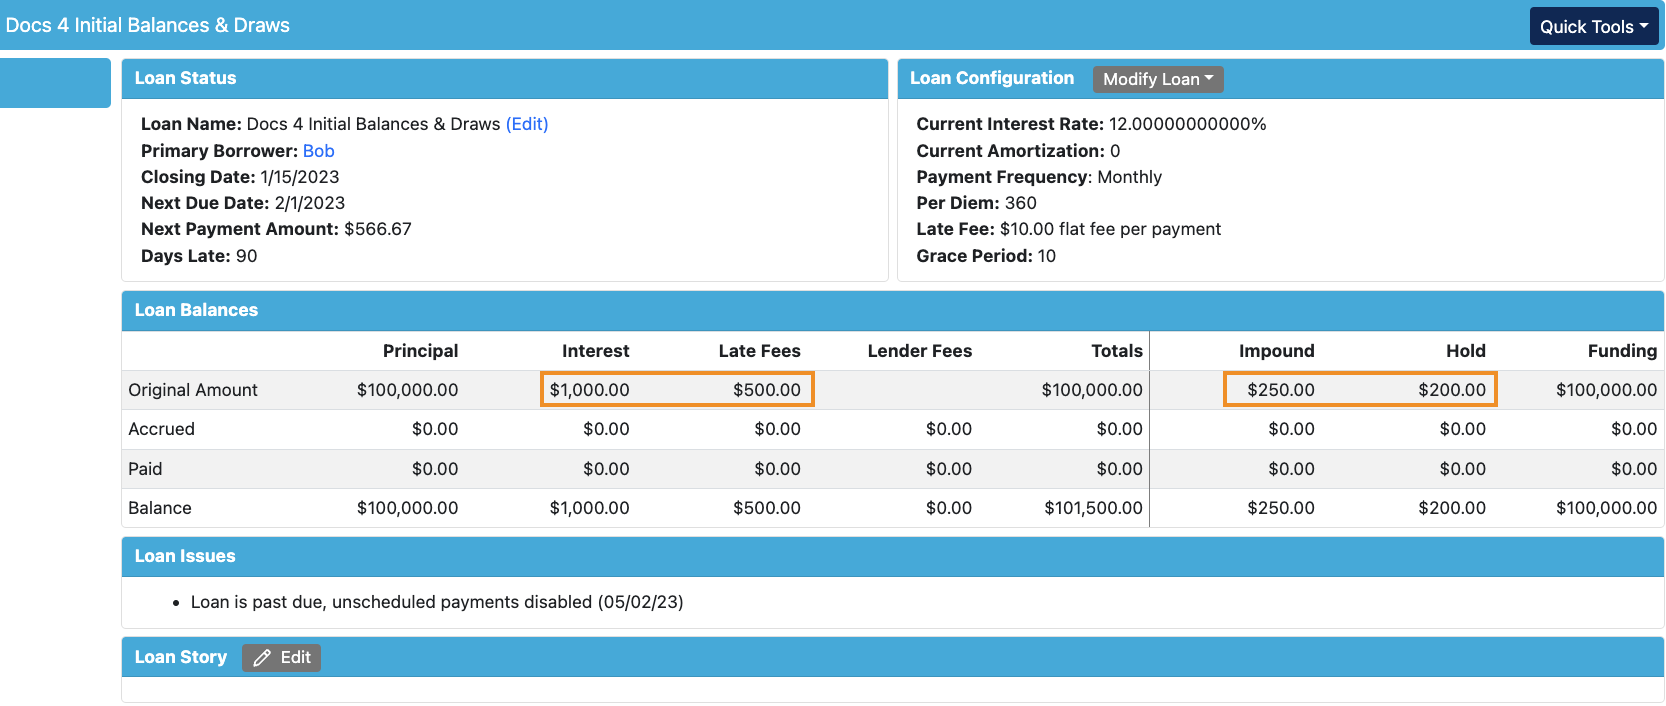
Add Initial Balances Guide
Once those user claims are assigned you will be able to see the 'Add Initial Balance' button under a created loan's Register tab (on the left-hand list of a loan). (Shown in image below.)

To get started, click on the 'Add Initial Balance' button and select your desired account type to add a balance to.
Guide Example: We'll be adding balances to each of the account types to show the difference in the loan's summary and how it reflects in the schedule with payments.
For 'Account to Apply Initial Balance to' select the 'Outstanding Late Fees' account. Enter your desired amount, $20 in our case. Finish by clicking the 'Save' button.
Note: You can also enter a negative value, which mostly applies to an impound account when transferring a loan from your previous system.
To accomplish this, you will first enter the number for the dollar value, and after you will type the negative dash symbol ("-") on your keyboard, which will show it as negative. 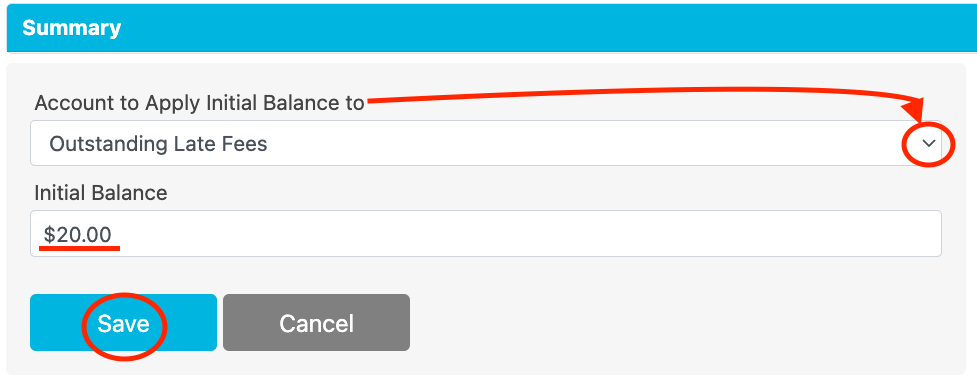 Once that's successfully applied, you'll see the Register view for the $20 balance and the amount applied to their respective accounts.
 Note(s):
- You can also delete any entries (only before making payments towards the created balances) if you'd like to change the amount(s).
- Notice the Date of these entries, it's using the loan's closing date even though they were applied in June 2022. This functionality was built around the idea that you must add these (initial) balances at the start of the loan.
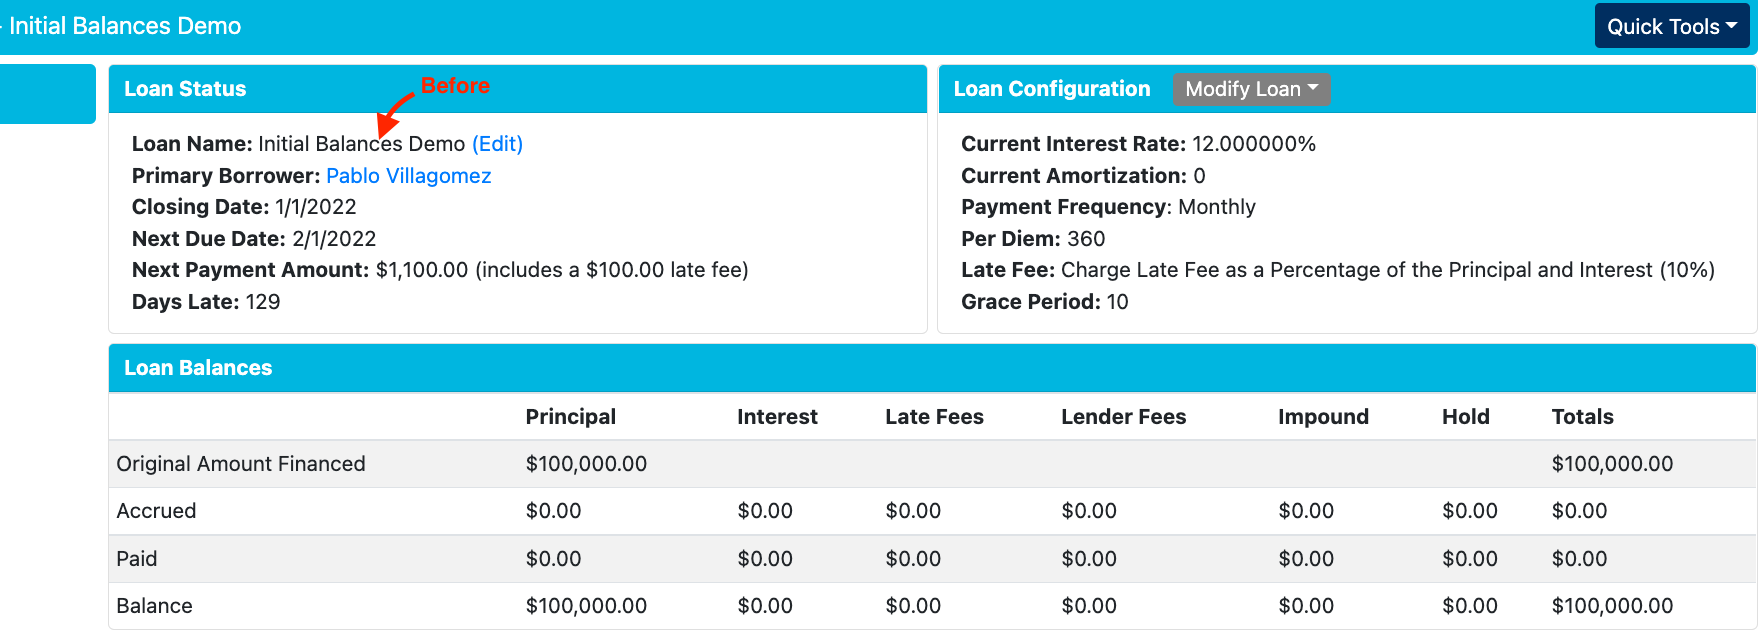
Following the same process described above, you can apply balances to outstanding interest, the hold account, and the impound account. Once those balances are added, you would see something similar to the image below.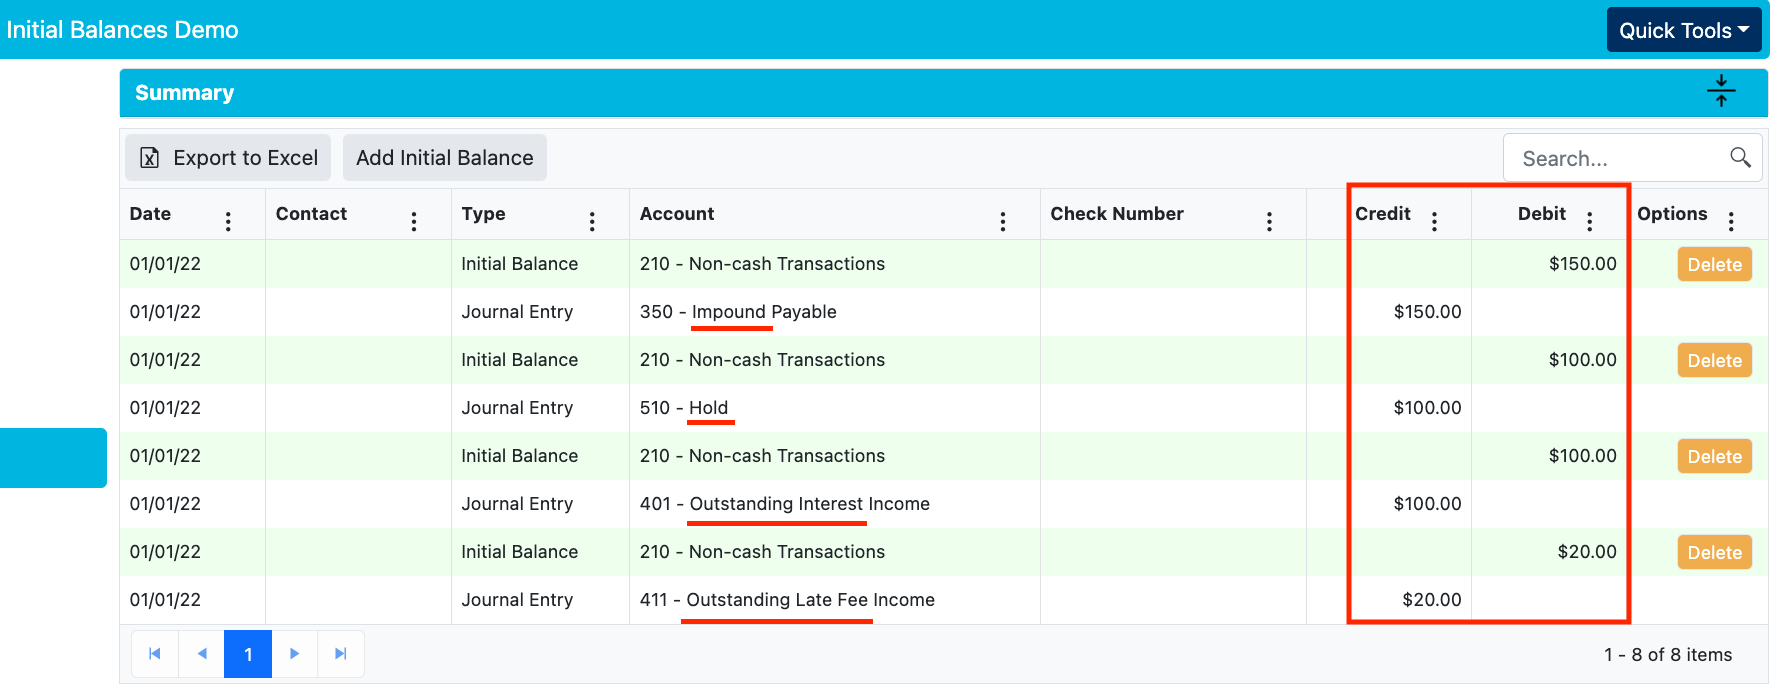 From here, you can see the changes/additions to the loan's summary page, the images below show a before and after.
From here, we'll take a look at the schedule and how you can expect payments to be distributed among these initial balances.
Guide Notes: We'll be trying to pay off all of these balances from the start. The $100 hold will cancel out the $100 outstanding interest amount, and we'll apply a $20 overpayment for the first payment for the outstanding initial balance for the late fee, and we'll make an impound payment of $150.

For the first pay period, I've selected the 'Regular Scheduled Payment' option and will apply the hold account balance to outstanding interest as an unscheduled payment immediately following the first pay period. Make sure to use the 'Enter Manually' button to allocate the recorded payment amount into their intended categories. In our case, we've gone ahead and removed the $20 from Outstanding Interest and entered it into the Outstanding Late Fees category.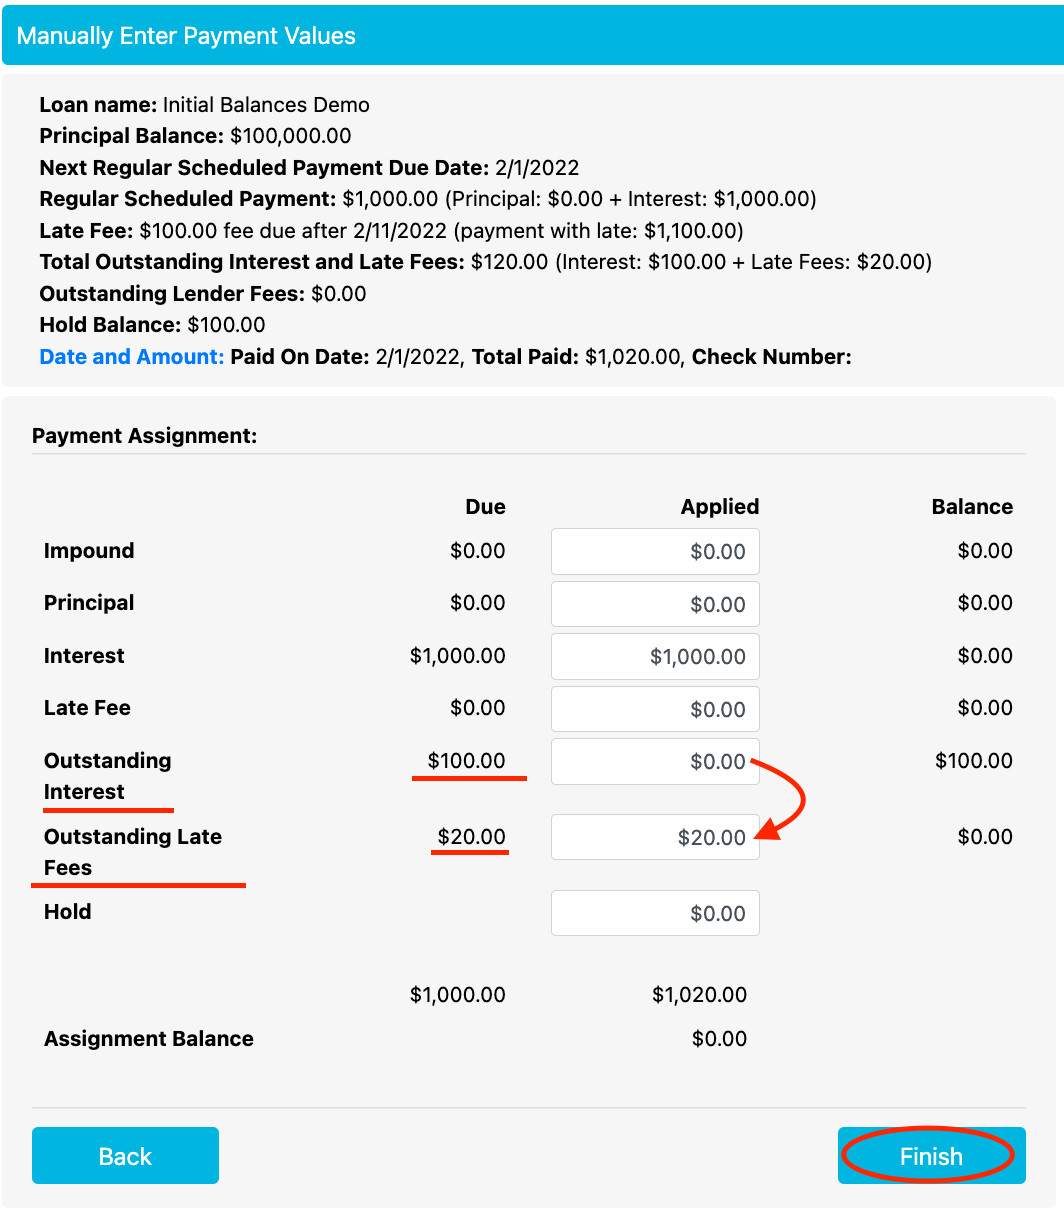
Now let's pay off the outstanding interest as an unscheduled payment using the hold account funds. Similar to before, make sure the amounts are applied to your desired payment category.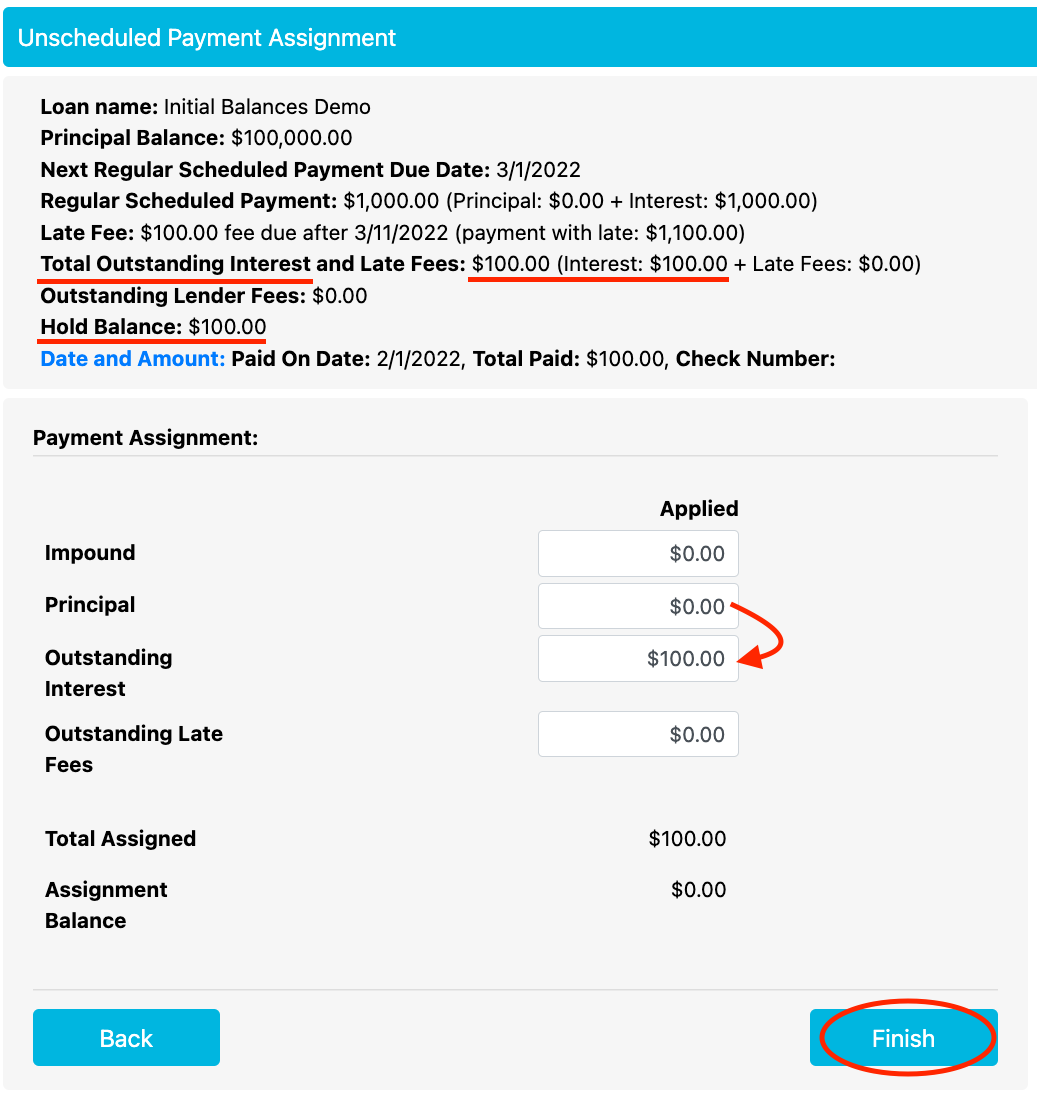
From there we'll make the Impound fee payout by going to the Impound tab and clicking the 'Pay' button for a previously configured Impound Fee, set to $0 to collect per period and set for one pay period.
Once the regular scheduled, unscheduled, and impound payments are made the loan's schedule will appear like the image below.
The loan's Summary Balances will reflect the paid amount statuses from the payments we've made along this guide's process.
The Loan's Register page now reflects the cash flow activities as well.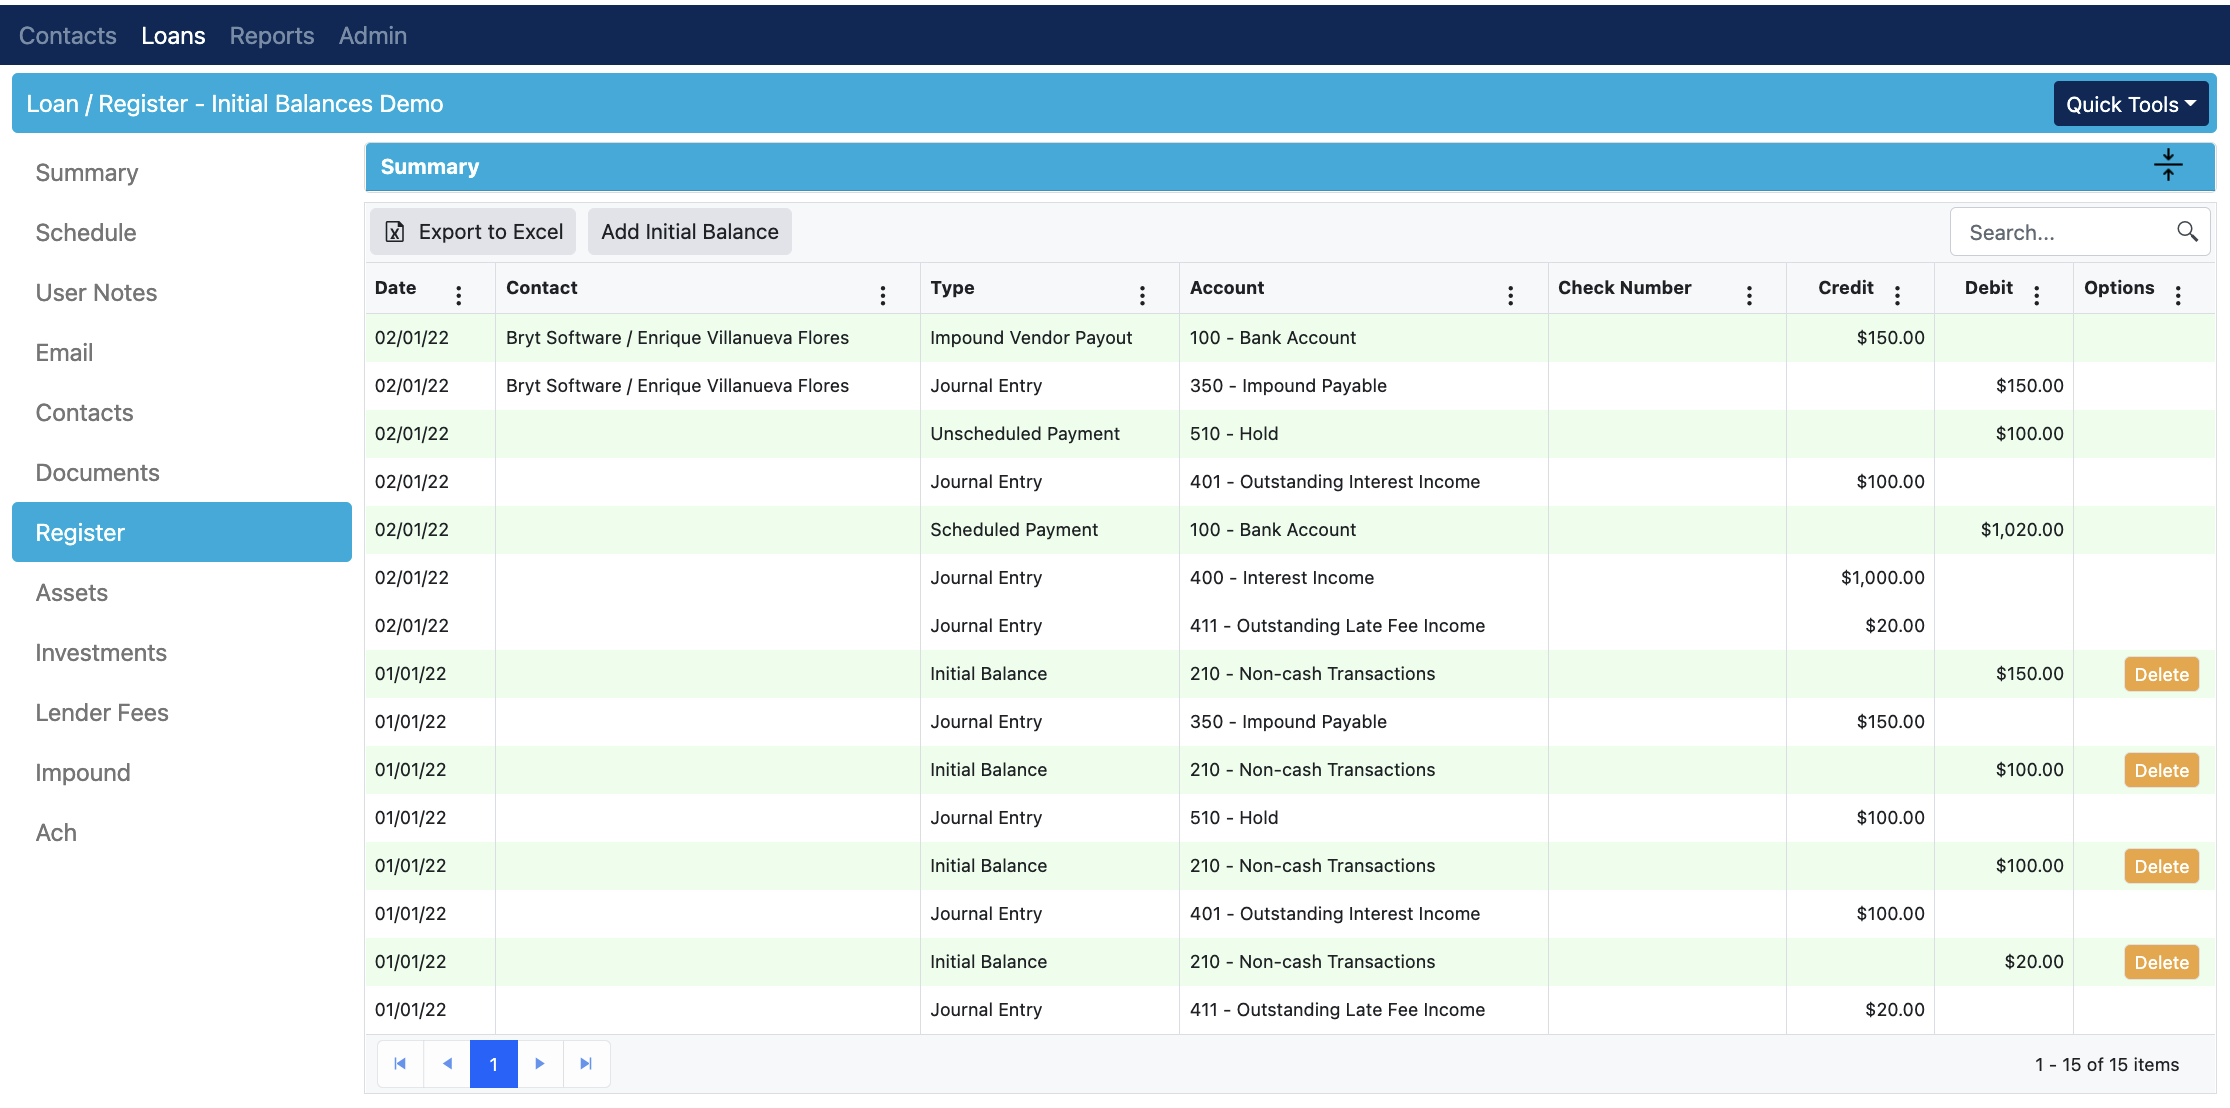
From here you'll be able to see how everything has been zeroed out and the loan can continue with a clean slate. That concludes this initial balances guide.
If you encounter any issues or have questions, please contact Bryt Support.