Individual Payment Option
- 12 Jun 2023
- 6 Minutes to read
- Print
- DarkLight
Individual Payment Option
- Updated on 12 Jun 2023
- 6 Minutes to read
- Print
- DarkLight
Article summary
Did you find this summary helpful?
Thank you for your feedback!
This feature is an add-on module and is only available if you have purchased this module. Contact your Bryt Representative to learn more about accessing this module.
The ACH Module allows you to take one-time payments directly from within Bryt. Alternatively, you can generate and share the payment link with your borrowers and allow them to submit payments on their end. In order to use this feature, you must have completed the ACHQ application for Merchant ID step.
The following tutorial is broken down into three sections: Processing One-Time Payment (Internally), Processing One-Time Payment (Generate Link), and Processing One-Time Payment (Notices), respectively.
Processing One-Time Payment (Internally)
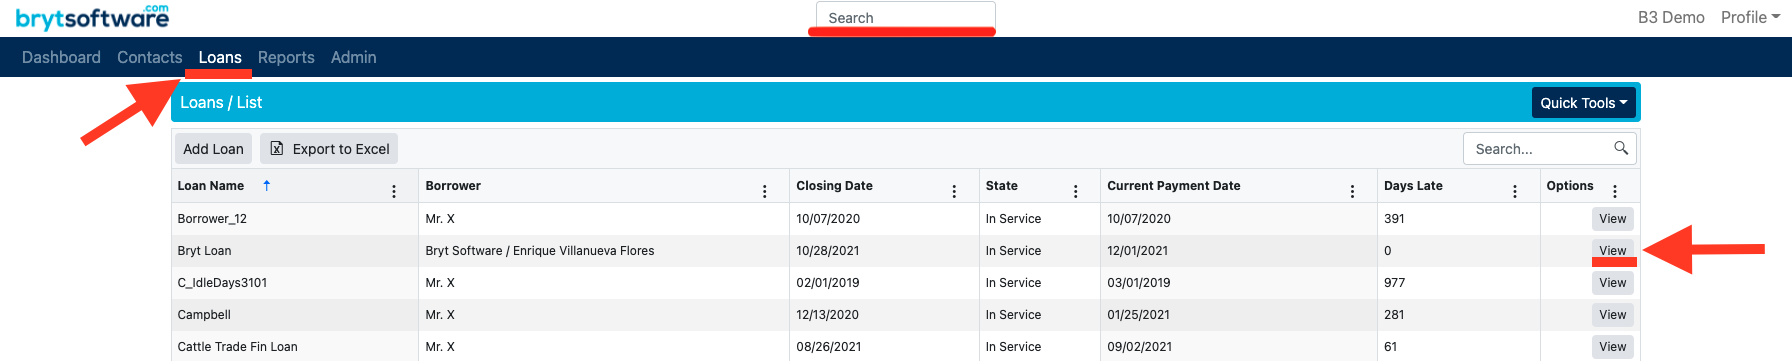
- To begin processing a one-time payment internally, you must select the loan that is being paid. Select the loan by navigating to the Loans summary page and clicking "View" next to the loan you want to pay. Alternatively, you can search for the loan using the Global Search bar.
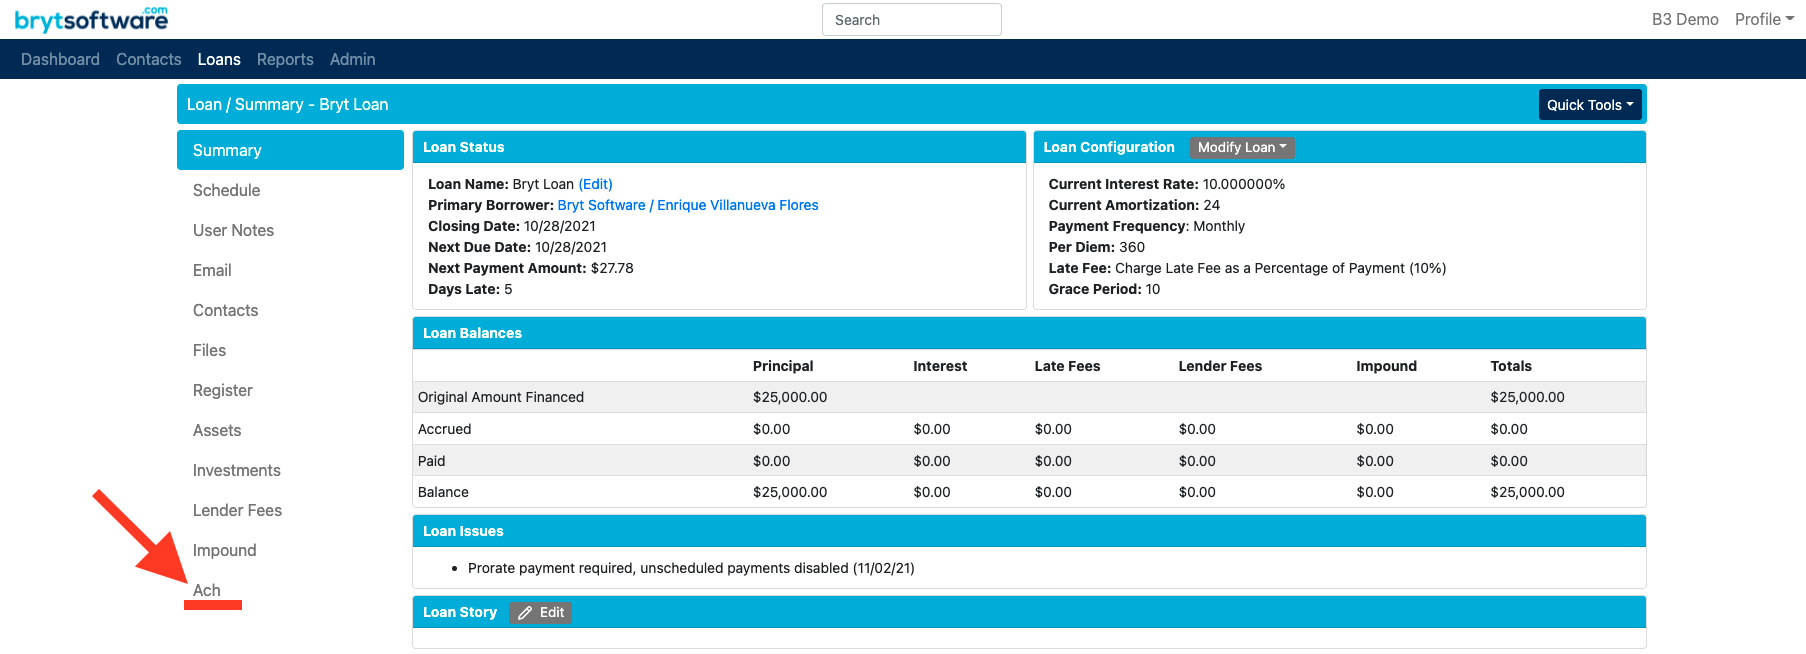
- From the loan summary page, select the "ACH" tab from the list of menu items on the left-hand side of the screen.
NOTE: If you have not successfully completed the ACHQ sign up process, you will see the following message: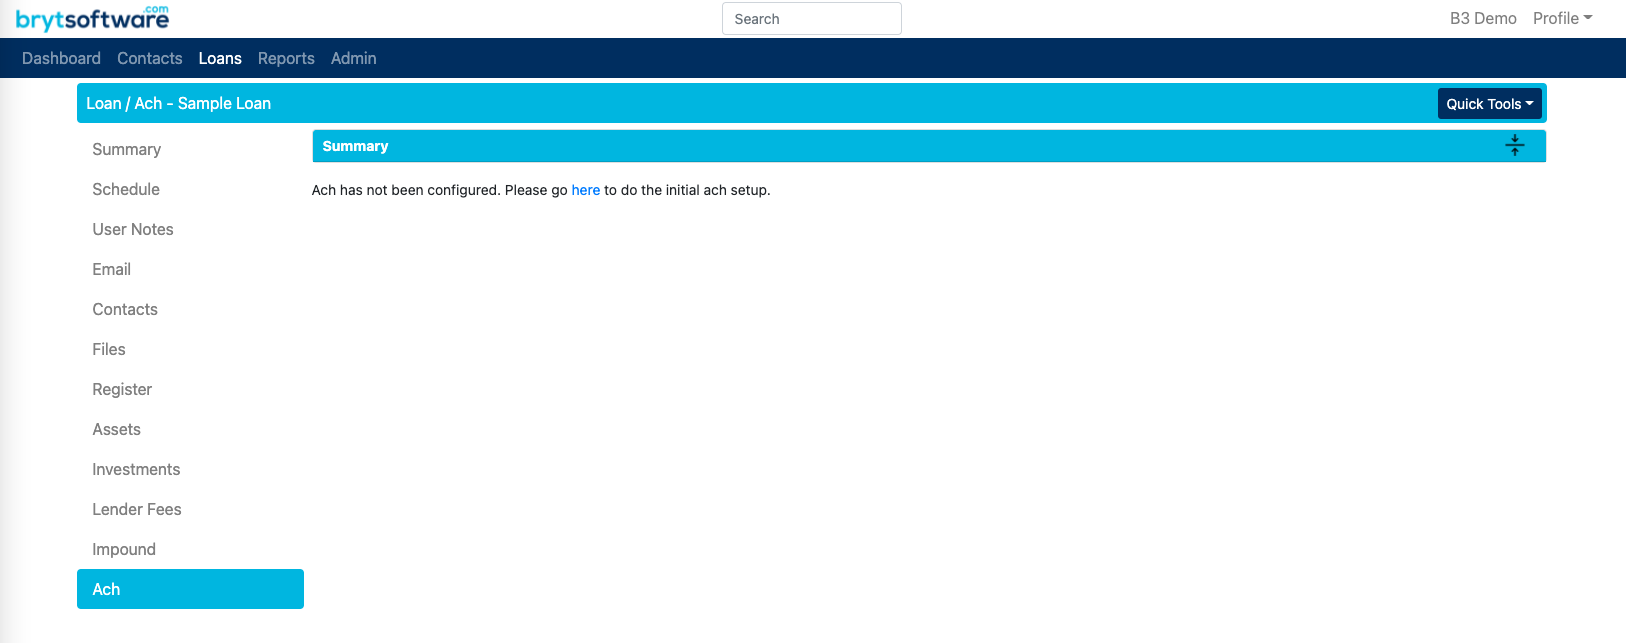 If this is the case, click the "here" hyperlink which will redirect you to the ACH setup page under the Admin options. Follow the steps provided in Application for Merchant ID to complete the merchant sign-up process.
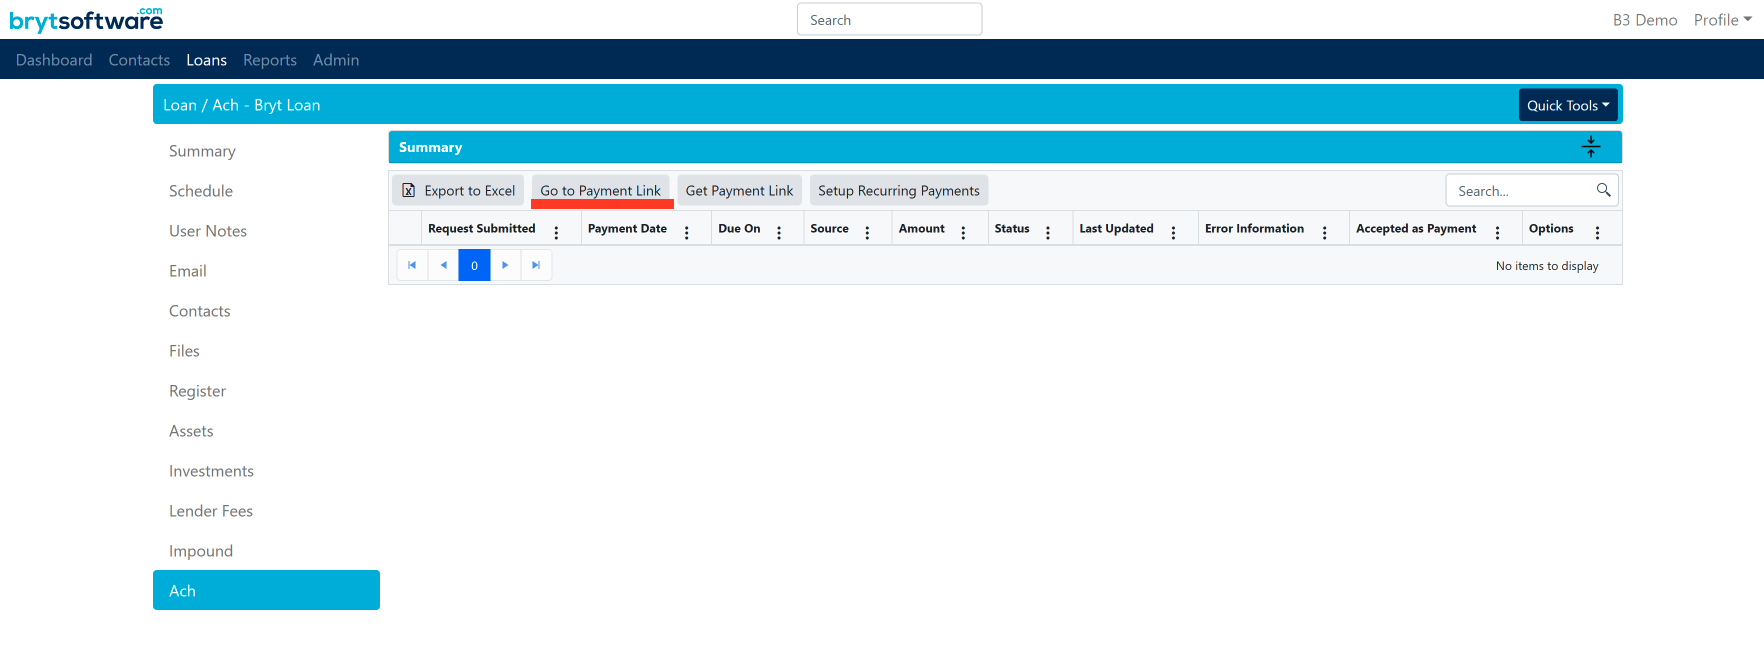
 - From the Loan's Ach page, you will notice you have a couple of options to choose from. In order to process a manual payment, select the "Go to Payment Link" button. This will redirect you to the payment form for that loan in a new browser tab.
- Once the payment form loads, Bryt will auto-populate any contact fields that have already been provided, you will need to fill in any missing information.
NOTE: The amount due presented in the form will always be set to the most recent amount due. If the "Payment Date" is set to a date where a late fee will apply, the amount due listed will also increase by whatever the late fee amount is.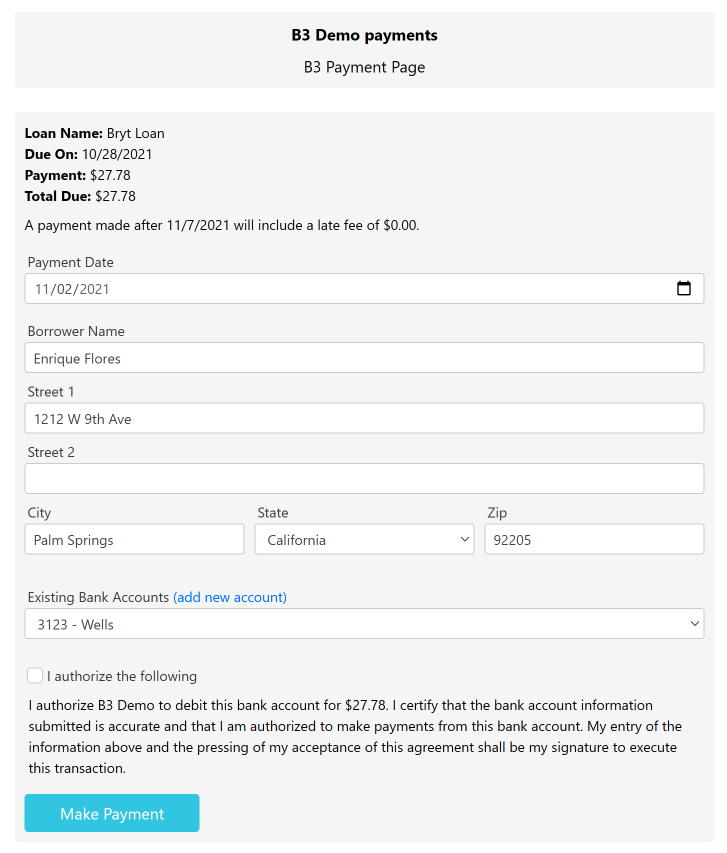
- Once the borrower's information has been reviewed, you must select the bank account from which you would like to pull the funds from. If you would like to add another bank account, select "(add new account)".
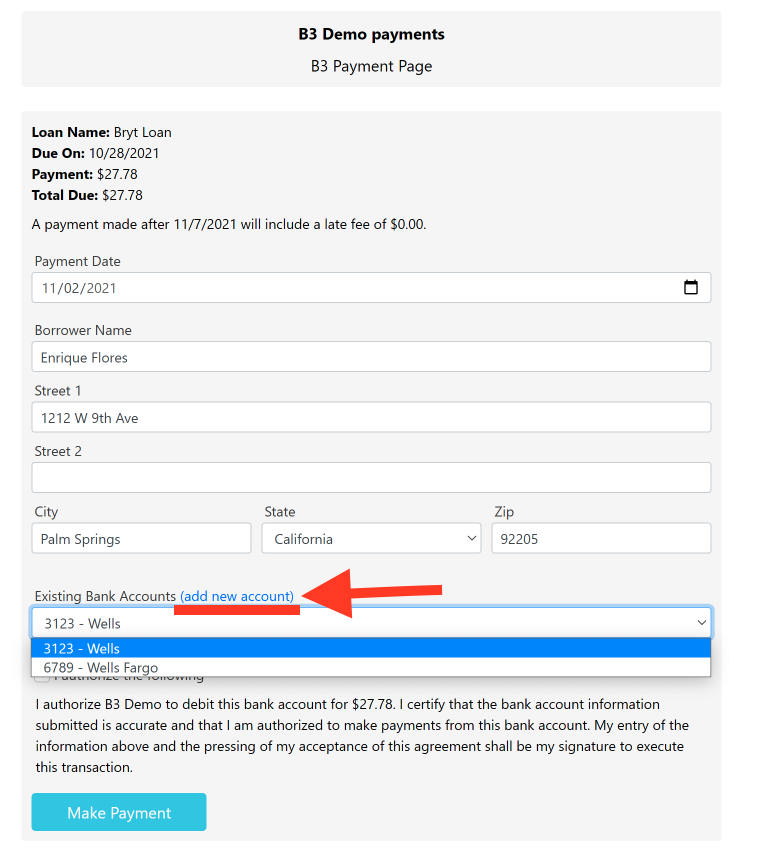 NOTE: When a borrower's banking information is submitted for the first time, it is tokenized upon submission so as to provide better security for you and your borrowers. The only information stored is the last four digits of the Account Number and the Bank Name in order to distinguish between the different accounts.
 - If you decide to add a new account OR the borrower has not yet set up a bank account, their payment form will look as follows:
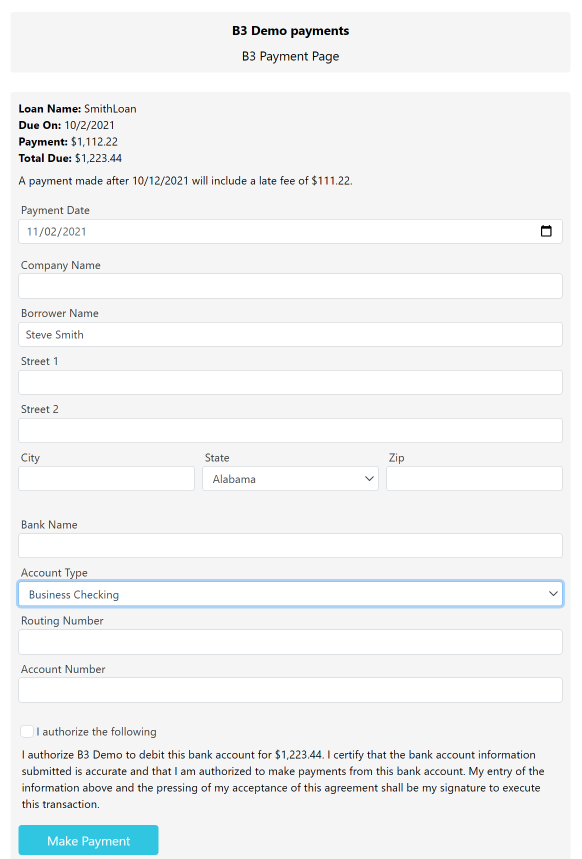 NOTE: When setting up a new bank account, if the "Account Type" is "Business Checking," you or your borrower, will be asked to provide a value for "Company Name"
 - Once everything is ready to be submitted, you or your borrower will be asked to authorize the web transaction before clicking "Make Payment." This is done to comply with NACHA rules and to protect you as the servicer from disputes, return fees, and reversed transactions.
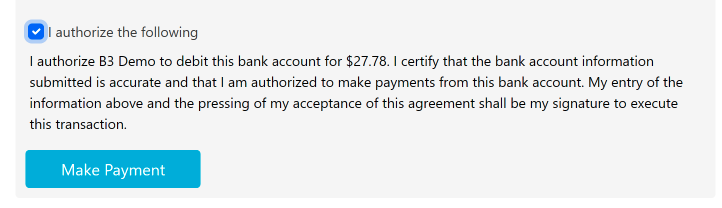 For more information regarding SEC Codes and authorizing ACH transactions, CLICK HERE.
 - When the "Make Payment" button is clicked and the payment is successful, you will be redirected to the following success page:

Once the transaction is successful, you can close the tab, return to the loan's Ach page (if not already there), and refresh the web browser.
Note: If there are any issues with the transaction, and it is not successful, you or your borrower will be presented with the page below. The contents of this page will display the issue* (for example, creating another ACH payment when there is currently a transaction in the queue), and any other support message you provide.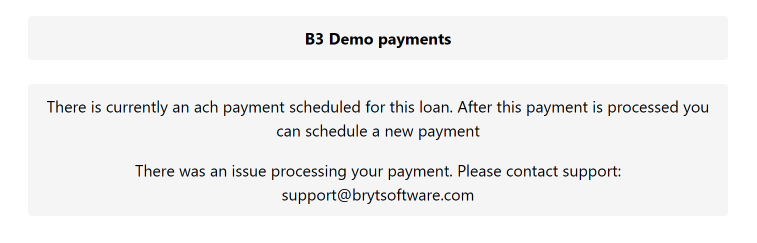 Update: ACH payments are now automatically accepted. Disregard discrepancies mentioning a manual acceptance of payment.
 - Once the payment has been scheduled you will see it listed on the Loan's Ach page (see image below). The initial "Status" of all successful payments is "Scheduled". See ACH Transaction Processing for more information regarding ACH statuses.
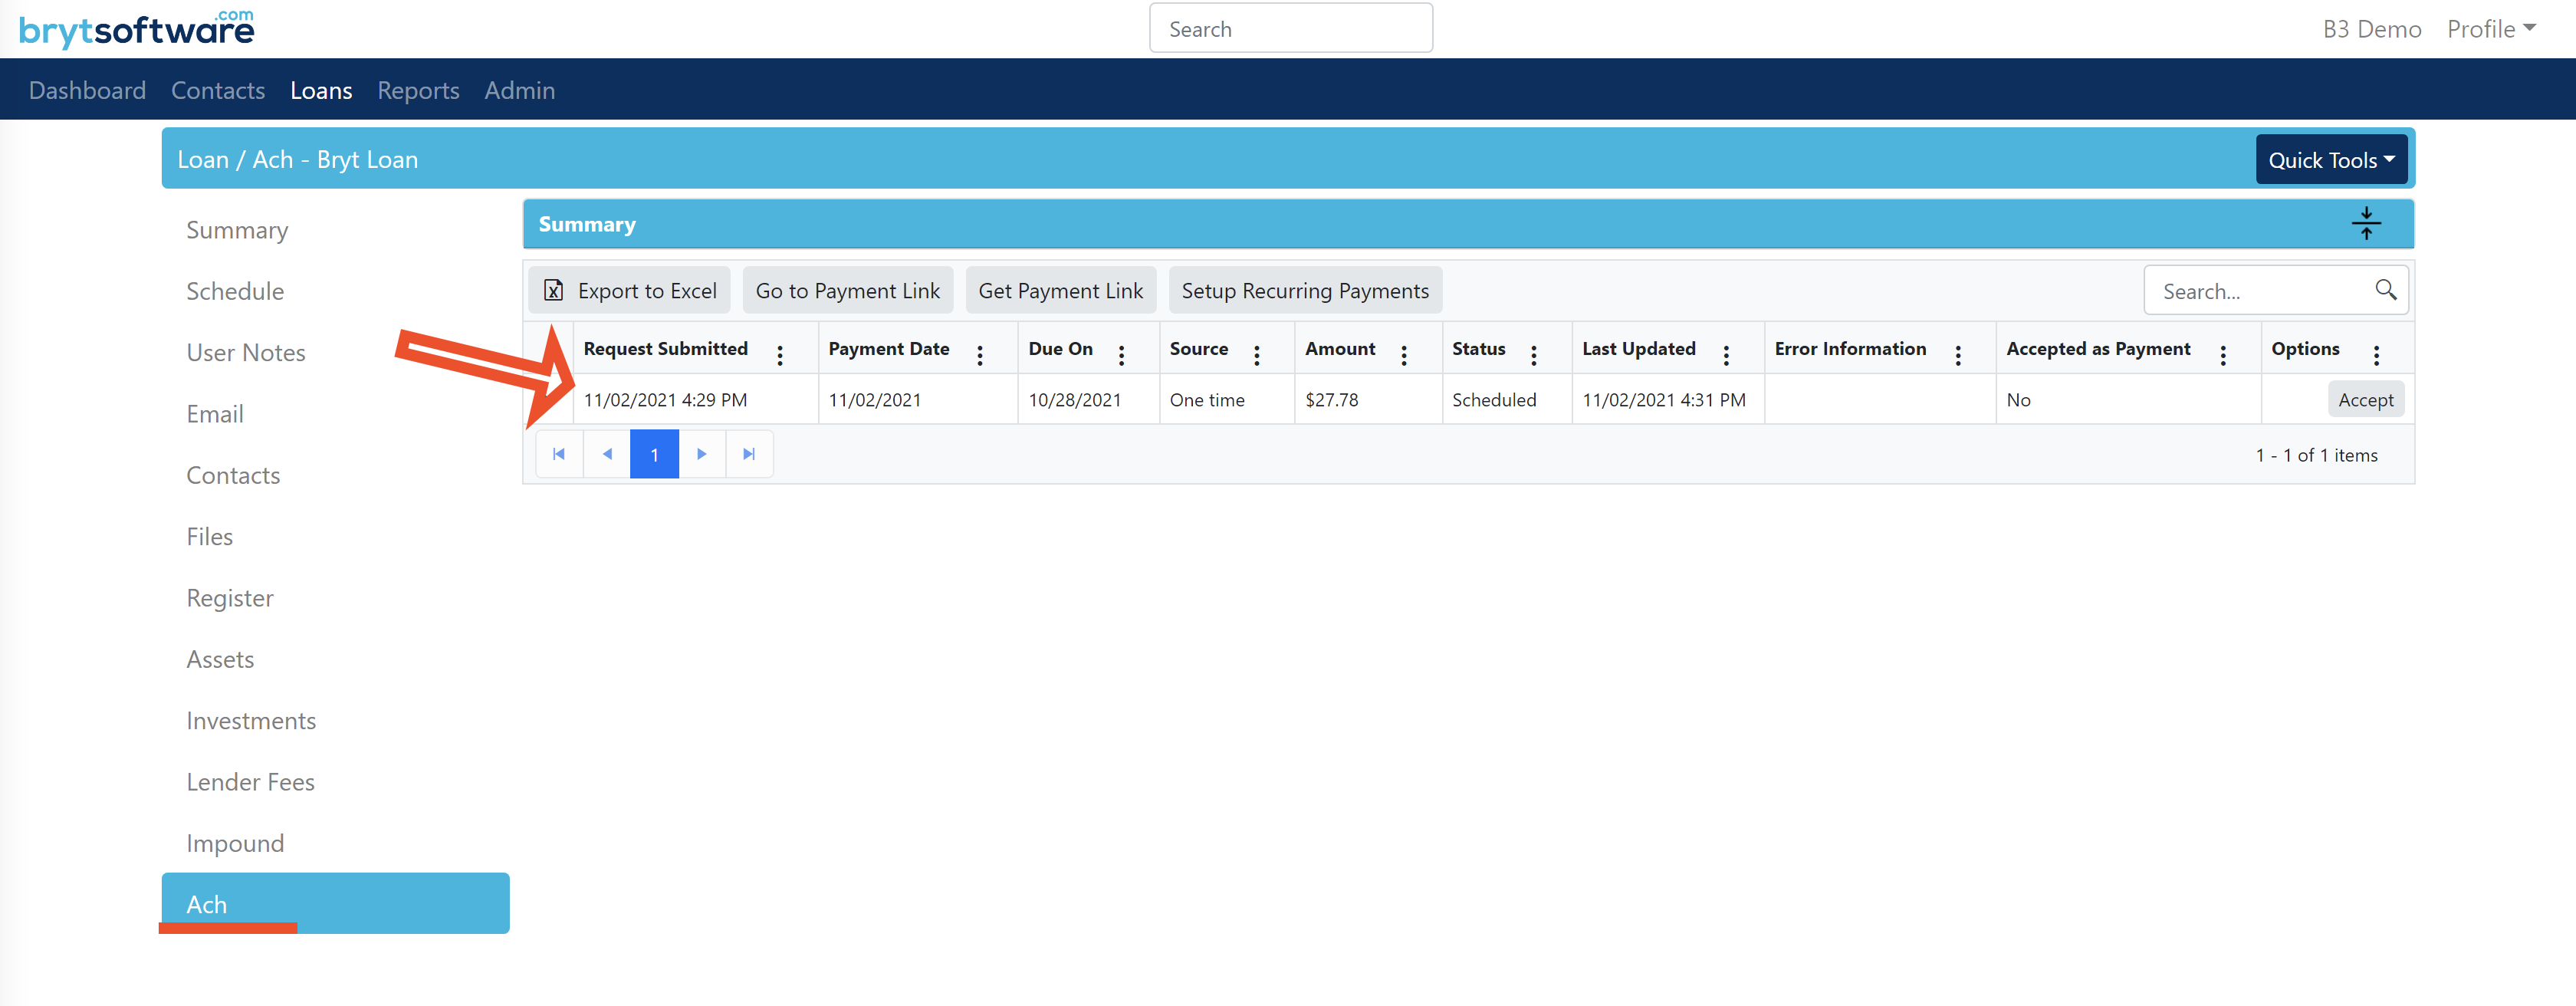 Note: If you do not see the payment listed, you must refresh your web browser.
 - After a system update to automatically accept payments, the Loan's Ach summary page will always display 'Yes' for the 'Accepted as Payment' column.

Notice that the payment is recorded as part of the Loan's schedule: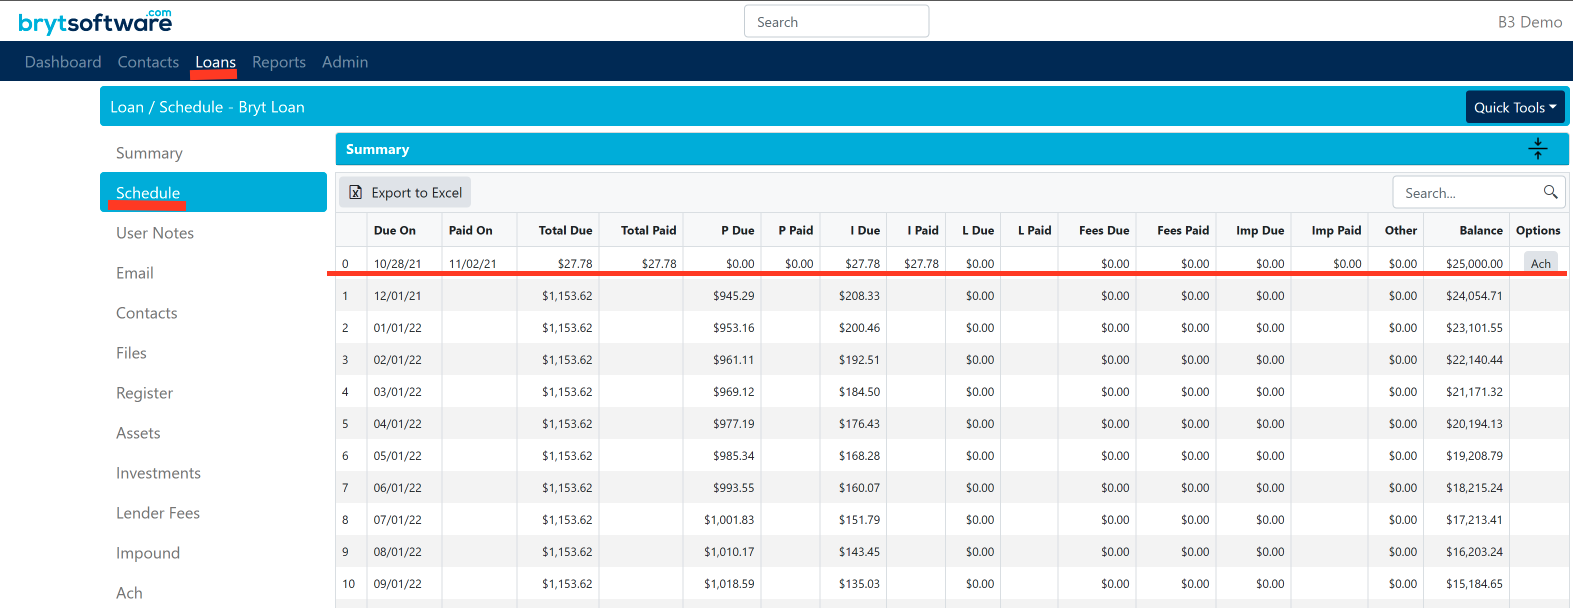
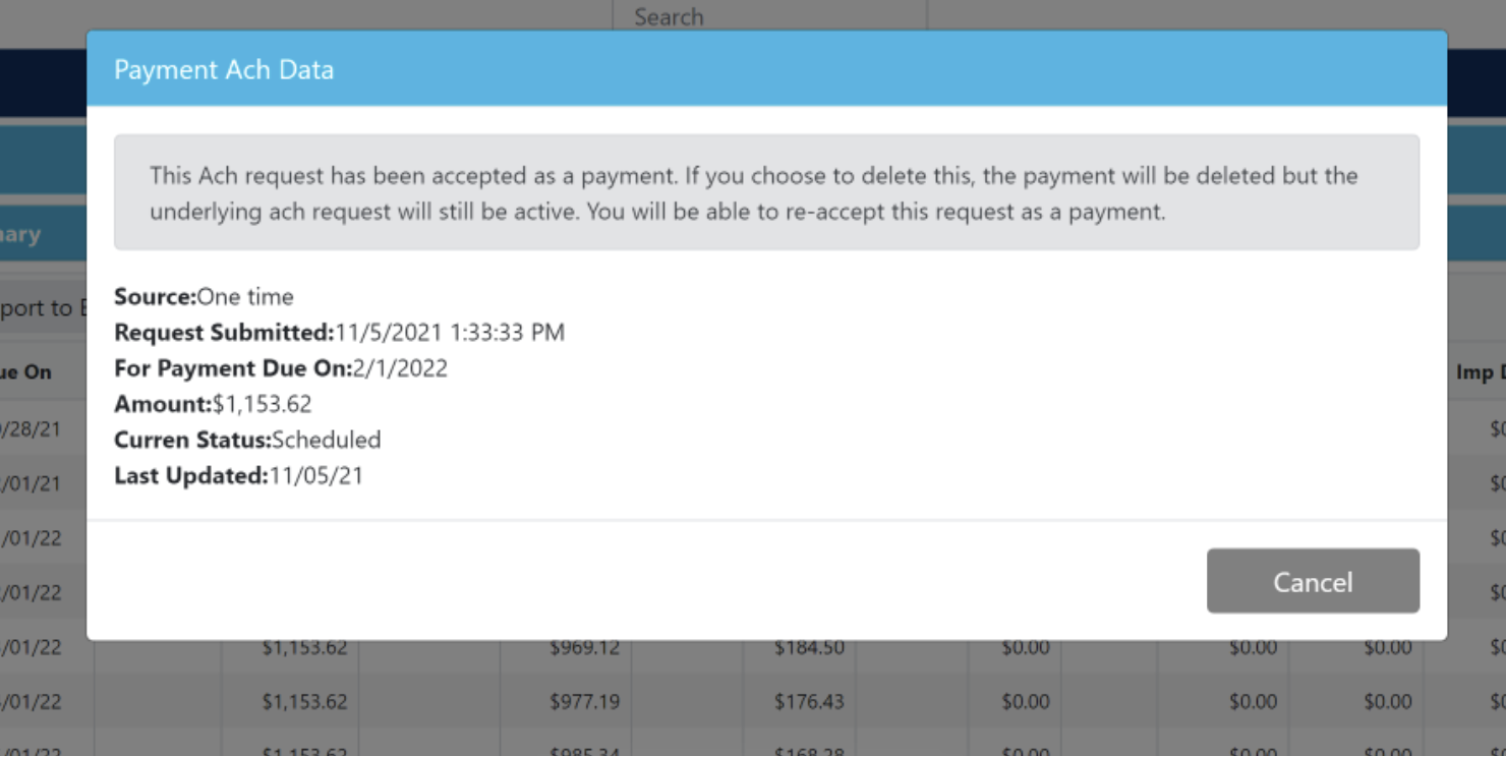
- You can get some more details about the Ach transaction by clicking the "Ach" button on the schedule of the loan.
.png)


 If this is the case, click the "here" hyperlink which will redirect you to the ACH setup page under the Admin options. Follow the steps provided in

 NOTE: When a borrower's banking information is submitted for the first time, it is tokenized upon submission so as to provide better security for you and your borrowers. The only information stored is the last four digits of the Account Number and the Bank Name in order to distinguish between the different accounts.
 NOTE: When setting up a new bank account, if the "Account Type" is "Business Checking," you or your borrower, will be asked to provide a value for "Company Name"
 For more information regarding SEC Codes and authorizing ACH transactions,

 Note:
Note:

.png)

This concludes the Processing One-Time Payment (Internally) tutorial
Processing One-Time Payment (Generating Link)
This process allows you to generate a link that can be copied and shared with your payee. The link is loan and borrower/payee specific and will redirect to the payment form for the specific loan. Keep in mind the link will expire 10 days after it is generated.
- Repeat steps 1 and 2 from the Processing One-Time Payment (Internally) tutorial.
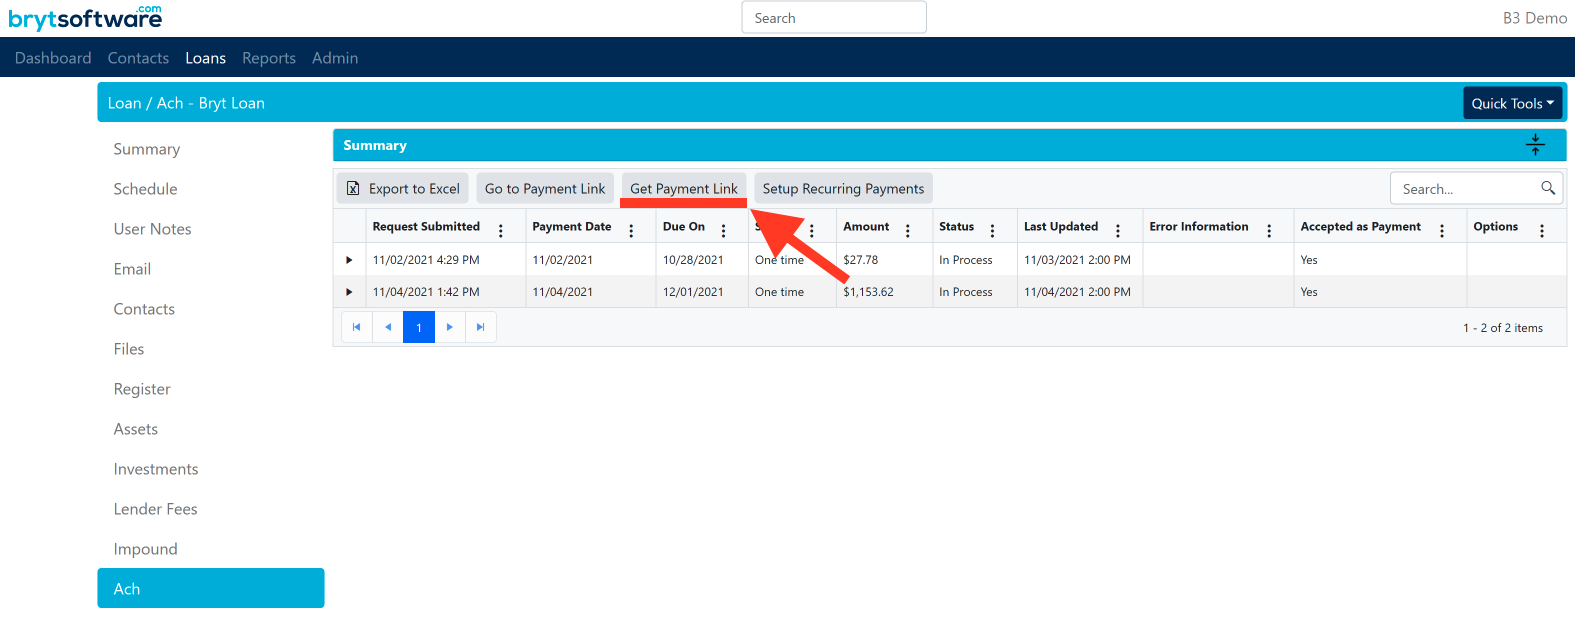
- From the Loan's Ach page, select the "Get Payment Link" button.
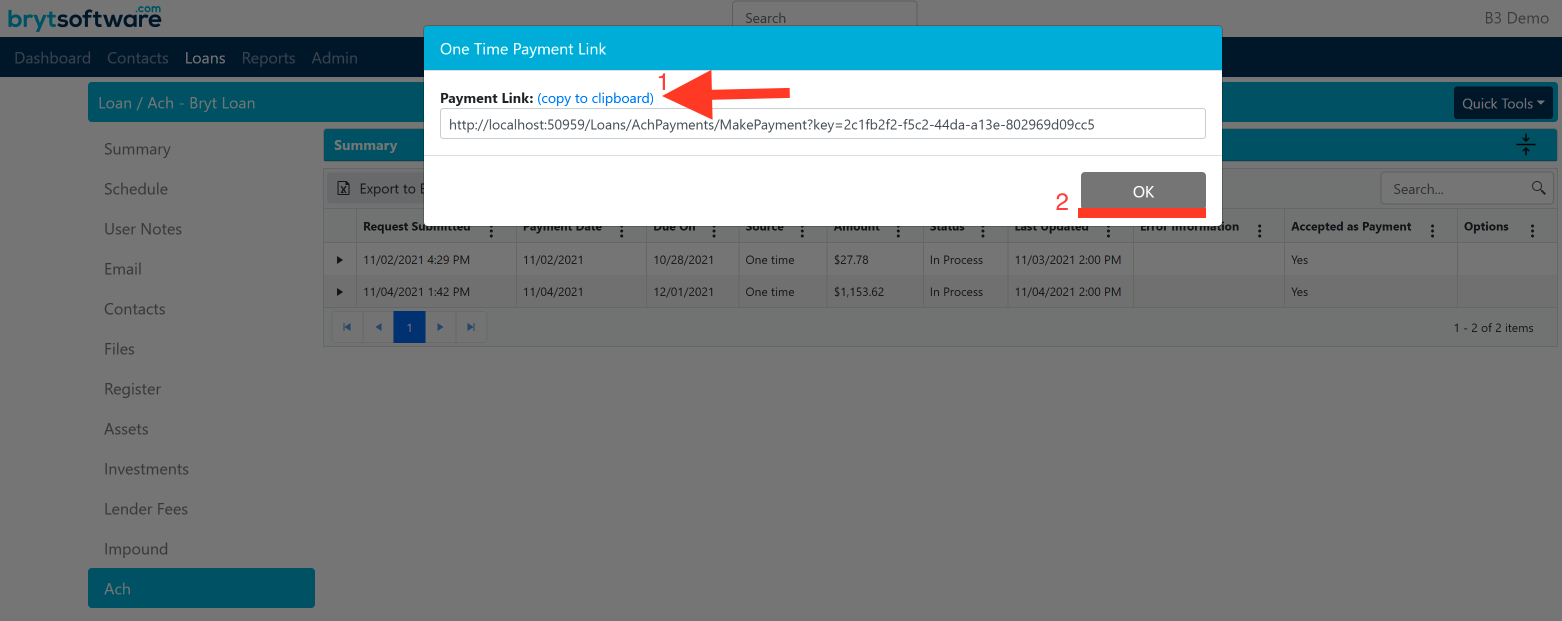
- This will generate a link to the payment form of the loan. Copy the link, then hit "OK."
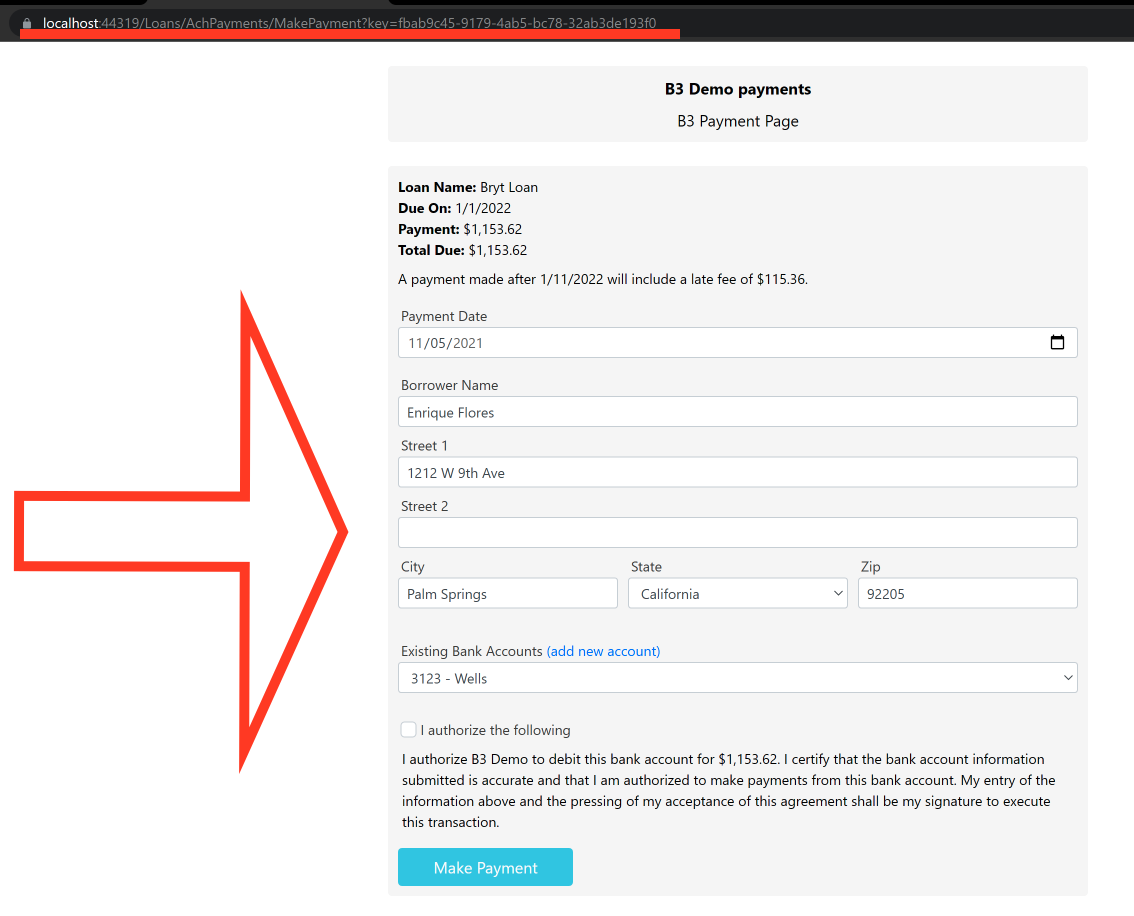
- Paste the URL link in the address bar (URL bar) of a browser.
.png)
- This link will redirect the user to the payment form of the loan.
- The remaining steps are similar to steps 4 through 11 of the previous section Processing One-Time Payment (Internally).
The user will have to select a bank (or add a new one if one does not already exist), authorize the payment, and select "Make Payment".
- The user will see a confirmation page if the loan payment is successful, otherwise, they will get an error page explaining the issue and any additional information provided by you.

- Once the payment has been made, you will see the payment and its status listed on the loan's Ach summary page.
.png)
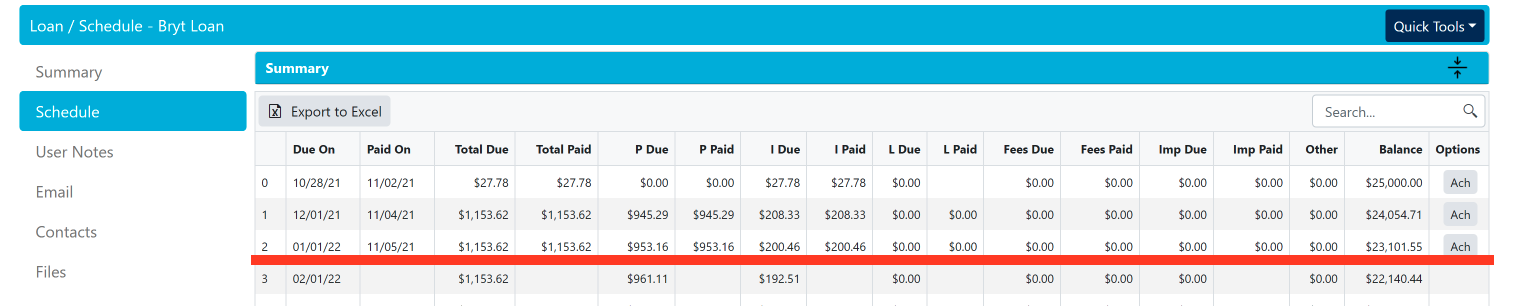
- The payment will be reflected in the schedule of the loan.
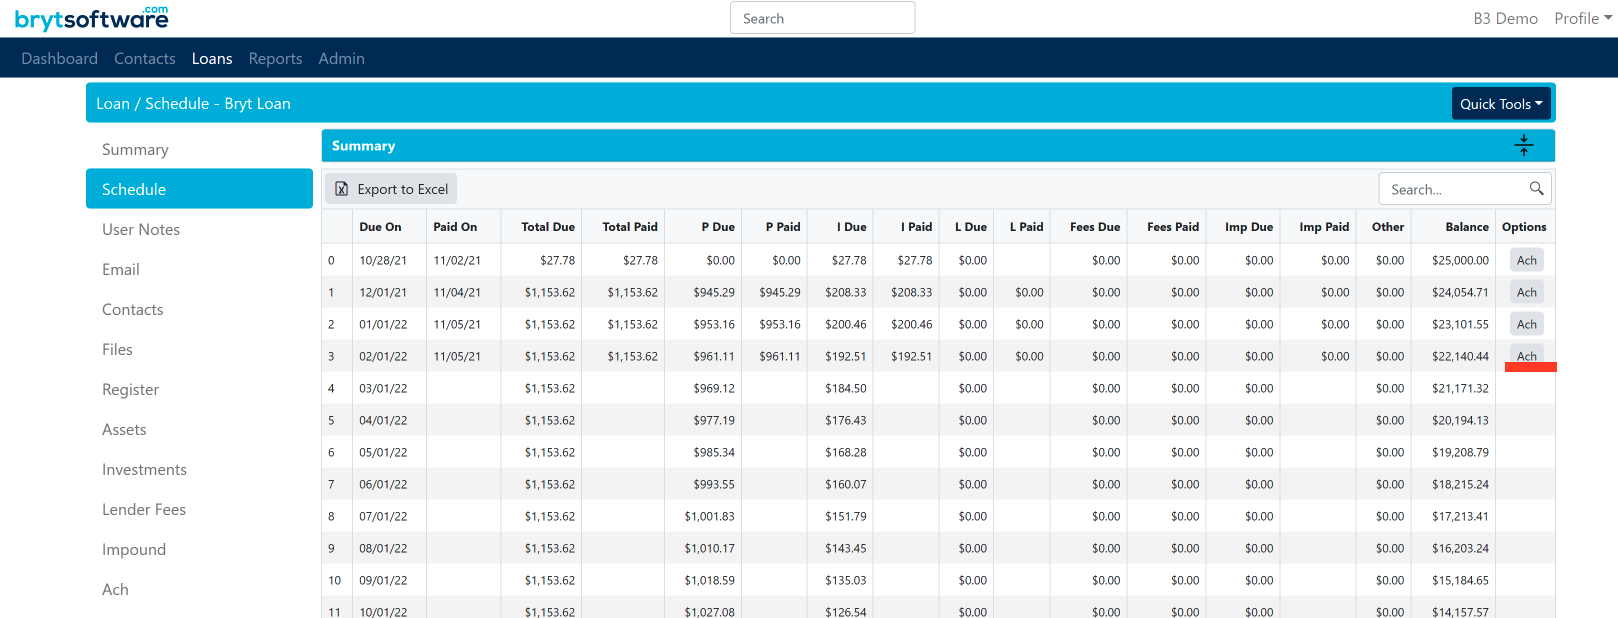
- If you would like to see more details of the ACH payment, click the "Ach" button on the last payment on the loan's schedule.
 Note: Links expire after 10 days and can only be paid once (for the current pay period).


.png)


.png)


This concludes the Processing One-Time Payment (Generating Link) tutorial
Processing One-Time Payment (Notices)
This process allows you to send a link via Notices that can be sent to all your payees. The link is only available for the Payment Request notice and will be generated for all borrowers (payees) and sent out automatically if the "Active" and "Auto Email" settings are set to "Yes", respectively. Keep in mind the link will expire 10 days after it is generated.
- Navigate to the Admin page
.png)
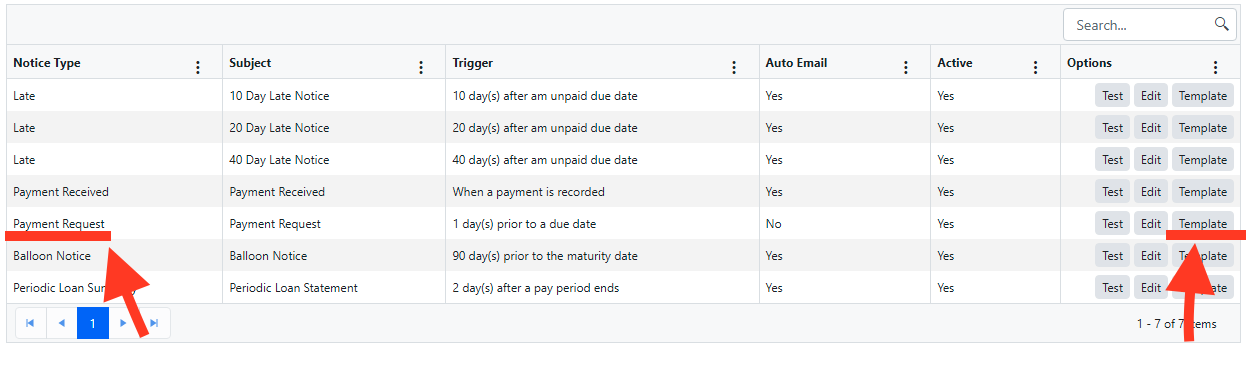
- From the Admin menu, select "Notices". Locate the Payment Request Notice.
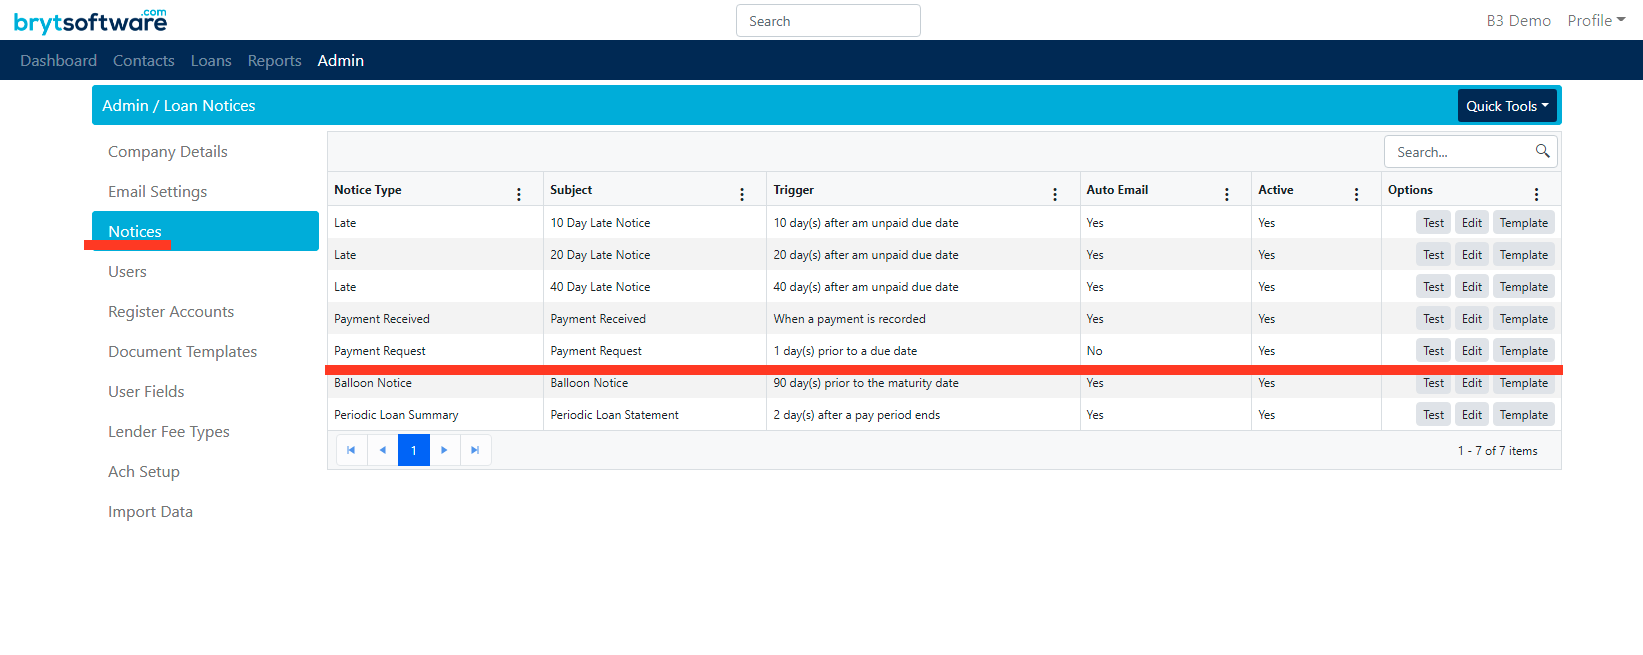
- Click the "Template" under the Options column of the Payment Request notice.
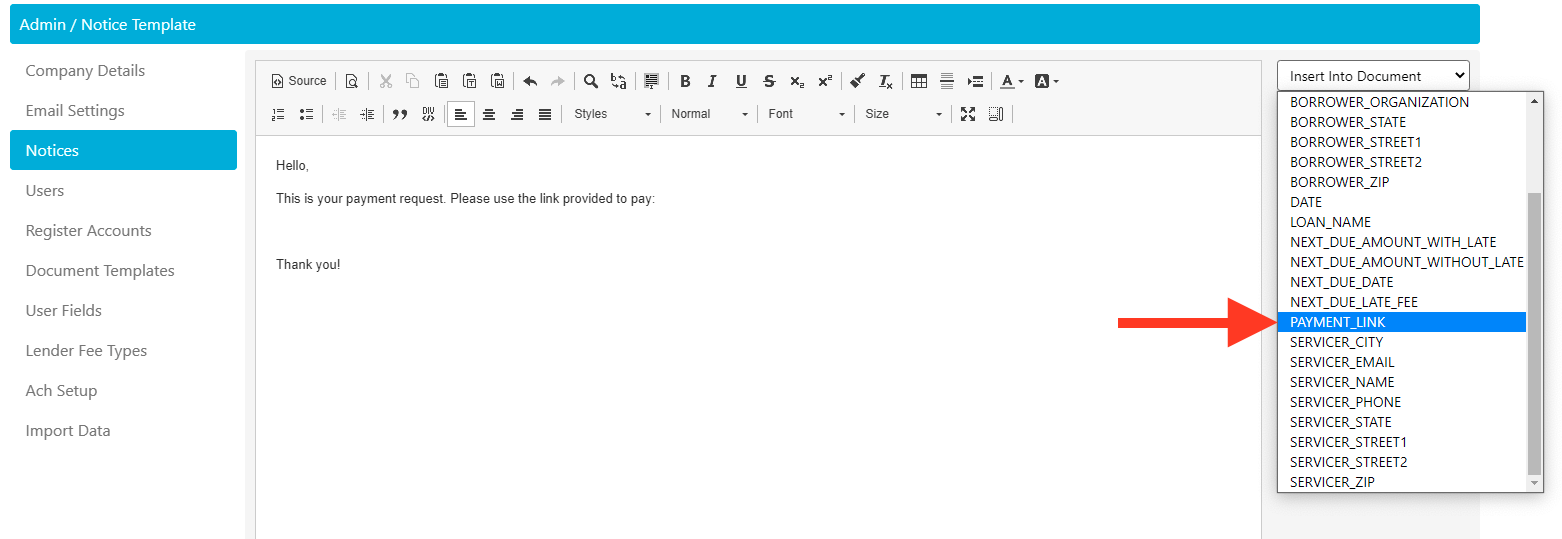
- From the notice template, click on the drop-down list of variables towards the right side of the template editor.
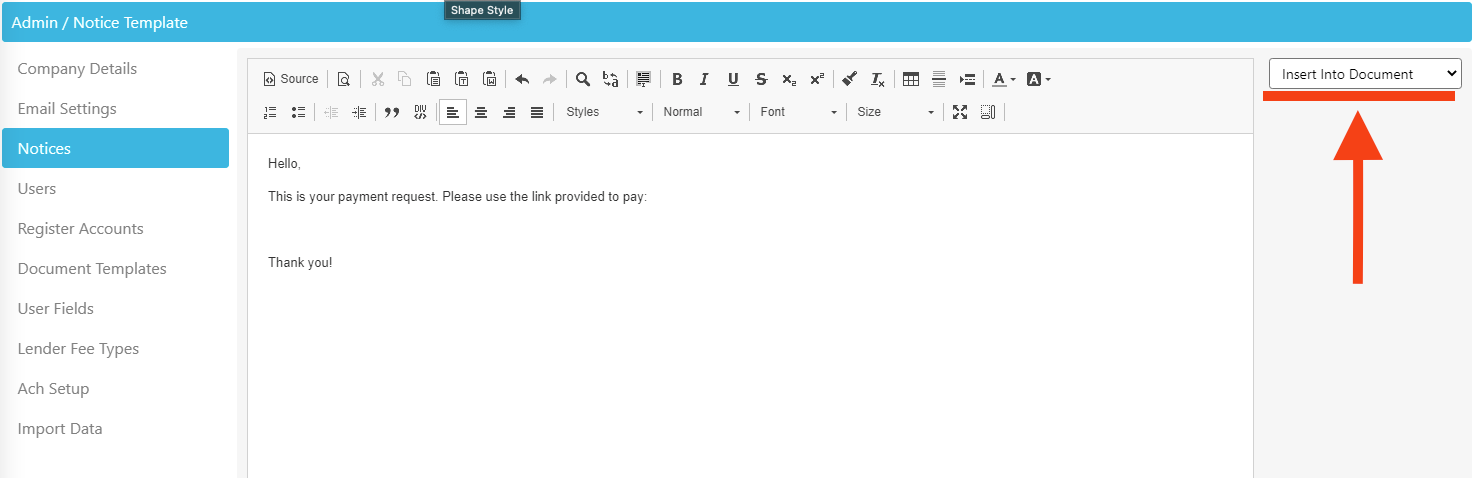
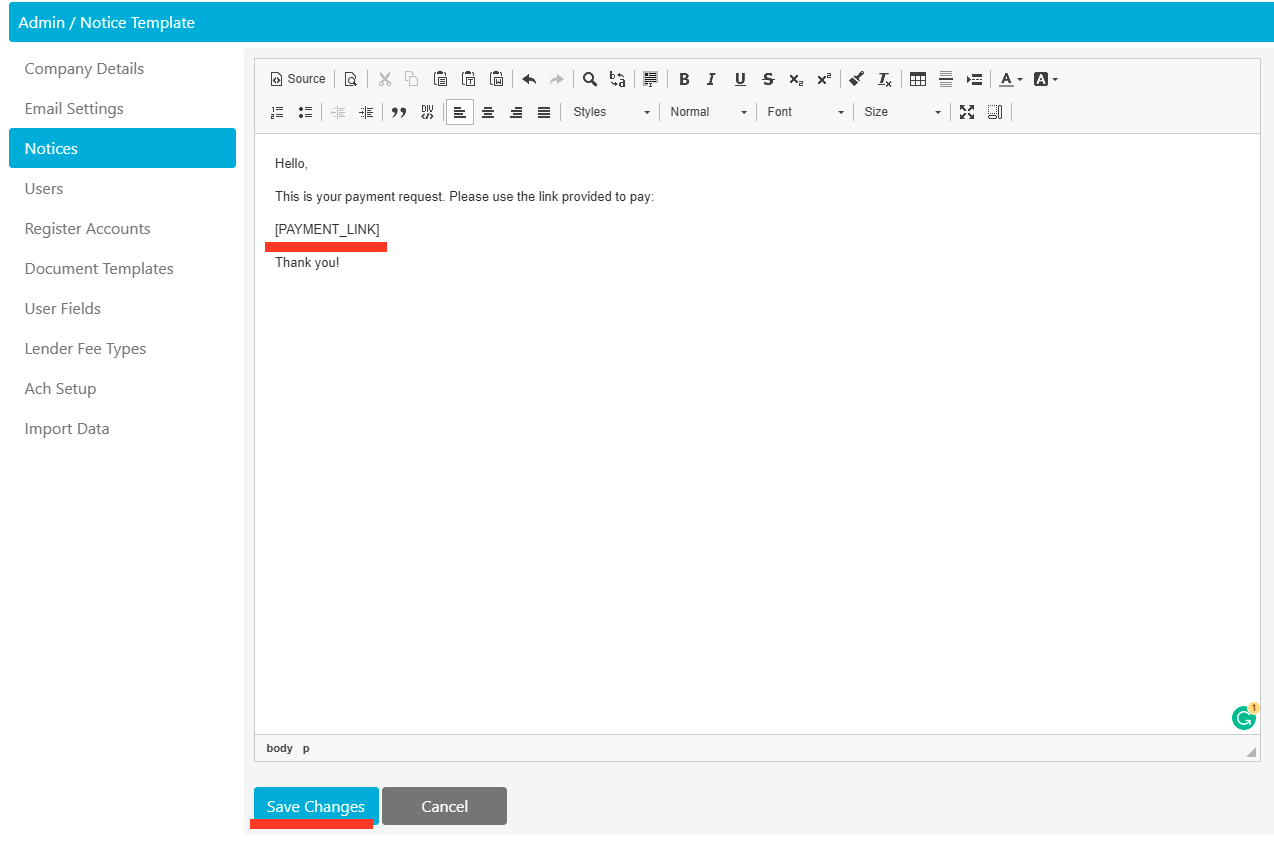
- Search for the "PAYMENT_LINK" variable and place it inside the notice template. Save your changes.
- A link to a payment form for each loan in your system will be sent out to their respective borrowers via email if they have an email associated with them.
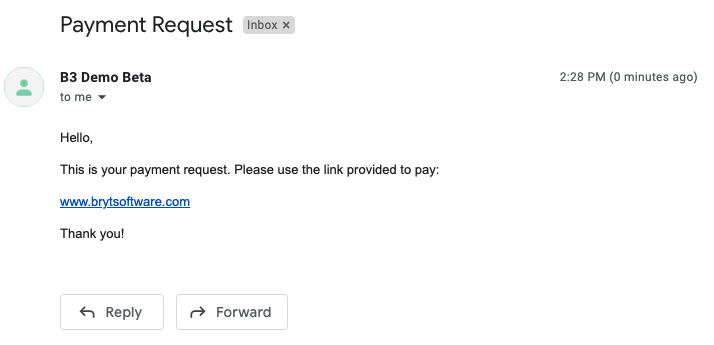
- This link will redirect the recipient to the payment form of the loan.
- The borrower will have to select a bank (or add a new one if one does not already exist), authorize the payment, and select "Make Payment"
- The borrower will see a confirmation page if the loan payment is successful, otherwise, they will get an error page explaining the issue and any additional information provided by you.
- Once the payment has been made, you will see the payment and its status listed on the loan's Ach summary page.
.png)
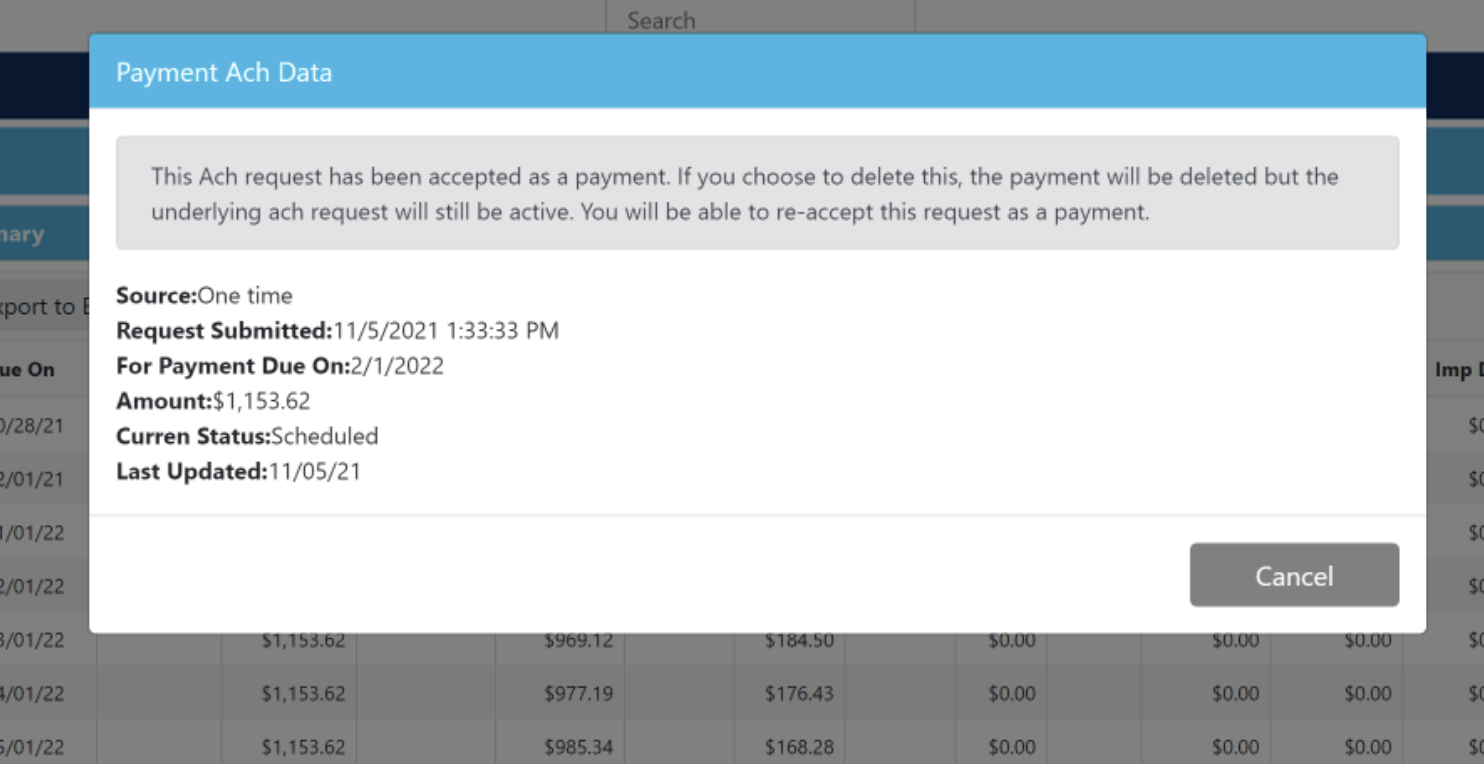
- The payment will have been accepted and will reflect on the loan's schedule.
- If you would like to see more details of the ACH payment, click the "Ach" button on the last payment in the loan's schedule.
.png)


.png)

This concludes the Processing One-Time Payment (Notices) tutorial
*Other examples of error messages include: Payment link expired, the loan requires final payment, and the loan has matured.